Hello
House of Pinheiro and Sew Far So Good readers! I am so happy to be
here for the Pin Cushion Swap. I am just itching to see what everyone
creates.
My name is Keri, I am South African (but have been in the UK for 10 years this June...yikes!) and I am visiting today from Two Little Flowers...where all sorts of random stuff goes on, including a bit of creating for my little corner shop.
I am nearing the end of my maternity leave and will soon be returning
to my job as an architect. Two Little Flowers is my outlet for
everything colourful and creative...and, more often than not is related
in some way to our two little flowers - Ava (3) and Chloe (1) - who are a
constant source of inspiration.
This
little tutorial today is for a crocheted pin cushion. Crocheting is
still a fairly new craft to me, so if you are looking to learn I suggest
that you first start by getting a family member to help you. I tried
first with books and You Tube, driving my Mum nuts on the phone in
frustration that I just didn't Get It. If you don't have
a knowledgeable family member - there are heaps of tutorials out there
in blogland! My Mum came over to help us with Ava when Chloe was born,
at which point I finally figured out this hooky business and have been 'hooked' ever since.
Ok,
so this isn't really all that tricky, and is easy enough to do while
being bugged by amusing a baby and small person...i.e. not much
concentration is required! But, maybe you are like me - and Like
Instructions for Anything and Everything? Well, then it is your lucky
lucky day!
Abbreviations
I am using UK crochet terms and my abbreviations are:
sl st = slip stitch
ch = chain
dc = double crochet
tr = treble crochet
Supplies
All
the supplies I used were bits that I had already. The yarn is Rico
Creative Cotton Aran. Colours I used are: Fuschia (13), Tangerine (76),
Orange (74), Natural (60), Pistachio (41). The colours in this yarn
are so very bold and pretty - but it can be a real pain in the butt to
crochet with as it is very splitty. The label says to use a 4-5mm hook,
I used a 3.5mm to make the stitches a little tighter, to minimise the
gaps.
This
pattern is my own and you are welcome to do what you like with it. A
little nod of recognition in my direction would be much appreciated.
Righty-oh...let's get on with this busy-ness...
What to do
Start with crocheting 4 chain stitches. sl st into the 1st chain to form a loop.
ch-3, then tr-11 {it will make life so much easier if you weave your tail in as you crochet}.
You are aiming for 12 spokes in your circle.
{You are correct...that IS a chopping board as the backdrop! Well spotted!}
sl st into the 3rd ch of your 1st ch-3.
Fasten off.
If
you wove your tail end in as you did your trebles, then pull that end
snug (so it is nicely hidden inside the stitches and not pulling the
circle tight) and snip it off.
Join your 2nd colour into your 12 spoke circle.
In this round your are working into the spoke gaps rather than the wheel stitches. {I
like to make a slip knot and pull that through and go straight into my
first set of chain stitches. But, you do what you prefer}
ch-3, then tr-1 into the same space as your chain. Again, weave your tail as you go.
tr-2 into each space.
You are aiming for 12x tr-2 clusters around your circle.
sl st into the 3rd ch of your 1st ch-3.
Fasten off. Snip your tail end as before.
Join your 3rd colour into your circle. Again, we are working into the cluster gaps in this round.
ch-3, then tr-2 into the same space as your chain. Weaving your tail as you go.
tr-3 into each space.
You are aiming for 12x tr-3 clusters around your circle.
sl st into the 3rd ch of your 1st ch-3.
Fasten off. Snip your tail end as before.
Join your 4th colour into your circle, in any cluster gap.
ch-3, then all still into the same space tr-2, ch-2, tr-3. You have a corner!
tr-3 into each of the next 2 spaces.
Making another corner: tr-3, ch-2, tr-3 into the next space.
tr-3 into each of the next 2 spaces.
Continue until your have made your square.
sl st into the 3rd ch of your 1st ch-3. Don't cut your thread!
For the next round we work in the cluster gaps and cluster stitches.
ch-3 - this stitch is acting as a tr-1 into the cluster space.
tr into the next 2 stitches.
All into the cluster corner space: tr-3, ch-2, tr-3.
tr into the next 2 stitches.
tr into the cluster space.
Continue in this way until your have made your square.
sl st into the 3rd ch of your 1st ch-3.
Fasten off.
One side done! Make another of the same or different - depending on how funky nuts your mood is.
Now
that you know how big your pillowcase is you can make a little cushion.
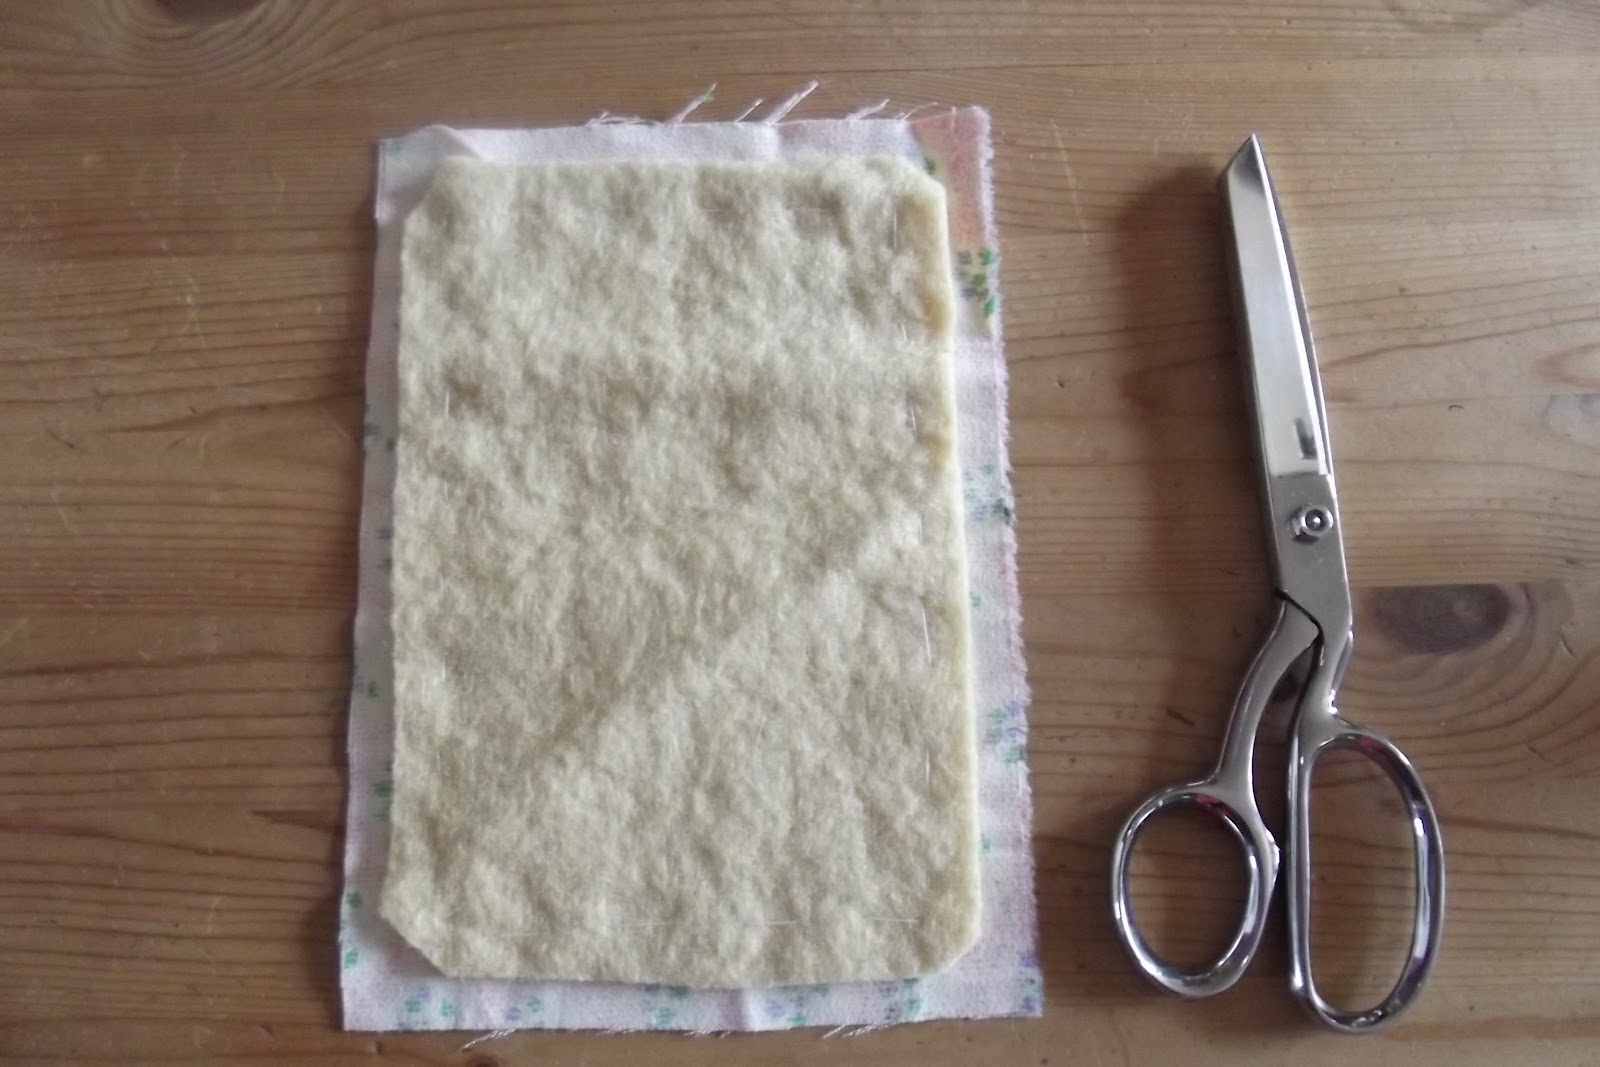
I made mine of white wool mix felt and filled it with rice. Make sure
that whatever fabric you use is pretty behind your pillowcase. You
will see it through the gaps. You could use a contrasting colour - play
with your supplies until you are happy with your choice.
So, measure the size of your crochet square. Mine was 10cm (4"). I cut out 2x 11cm (4.3") squares.
With
the fabric wrong sides together, sew around 3 edges with a narrow seam.
You are aiming for your cushion to be a smidge smaller than your
pillowcase. Snip the 2 sewn corners and turn the cushion right side
out. Fill your cushion with your filling of choice. I chose rice (at
my mothers suggestion - thanks Mum!) because I wanted something a bit
heavier than toy stuffing. I like the idea of emery sand a lot, but a
bit of googling resulted in only USA finds...and I wasn't prepared to
pay the nutty postage prices. Rice was in the cupboard, so it was used!
I
wanted a nice plump pincushion, so filled my cushion until there were 2
fingers of empty fabric left. As I didn't feel like fighting with
escapee rice and my sewing machine, I just did a small running
hand-stitch across the opening to close it all up...checking that rice
could not escape my stitches...
Back
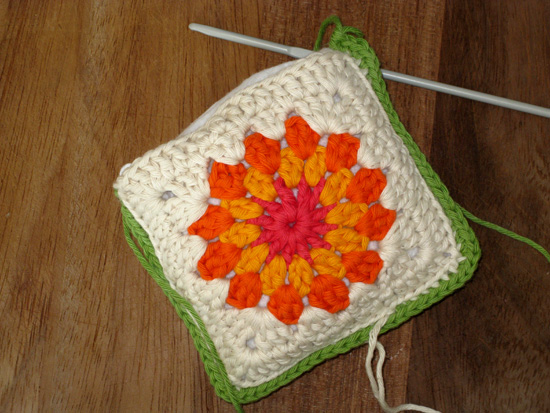
to the hook and yarn. Place your 2 squares wrong sides together, so
that the corners line up. We are going to dc the 2 squares together. I
used a contrasting green against the cream for a bit of extra colour
pop. When joining, only hook through the back loops. This adds a
little ridged detail line between your square and the dc edging.
On
your squares, at your corners, you have a corner space. These corner
spaces are made of 2 chain stitches. When you are doing your joining,
dc-2 into each of these chain stitches.
So...Hook through both squares into the 1st corner chain stitch to join in your yarn. {I used my slip knot method here again}
ch-1 (only 1 of your dc-2 here, we will add the 2nd one at the end)
Into your next corner chain dc-2
dc into all the stitches until you get to the next lot of corner chain stitches.
dc-2 into the 2x corner chain stitches
Continue until 3 sides are joined together.
Wriggle
your cushion into the pillowcase, making sure that all the corners are
nicely filled. Tuck your cushion down so that you can close up the
opening.
Continue with your dc until your reach your starting chain.
dc into this same stitch and then sl st into your starting chain.
Fasten off and weave in any remaining loose ends.
Go banana's pushing your pins into your new pin cushion. {you have been spared my boring yellow-ball pin heads}
....oooooh,
so pretty and sunflowery in the lovely bright sunshine....Or, make a
bunch more for juggling or for your kids to steal....I have to hide mine
from Chloe...I am not sure if it is the weight or bright colours or
texture that attract her to it, but she likes it a who-o-o-o-le bunch!!
Rats!
This whole pincushion-y business is addictive. My brain is rattling
away with more pincushion-y goodness...crochet top, fabric bottom -
hmmm....pretty :: crochet doily stitched to pretty fabric
cushion....oooooh :: scrappy crochet stripes with pretty hand
embroidered something....oh dear...
Here's to happy pincushion-creations!
I for one can't wait to see what my swap partner creates for me...and to see what everyone else receives.